bit-bar
: Disagreement by design!
A More Useful Explanation of Basic Knitting Technique
I am a self-taught knitter, and have been knitting for several years now. I recently came to a deeper understanding of what is actually happening as you knit new stitches, and I wish it had been communicated to me when I was starting out.
All the resources that I encountered when I was first learning the basic knit and purl stitches describe the process in a specific way. Generally, something like:
-
Insert the working needle knit- or purl-wise through the next stitch.
-
Wrap the yarn around the working needle appropriately.
-
‘Pull’ the looped yarn through the stitch, forming a new stitch on the working needle, and allow the original stitch to drop.
My objection here is with the description of ‘pulling’ the yarn through the stitch. It’s not incorrect per se, but the way it’s depicted generally shows a ‘before’ shot with the yarn wrapped around the working needle and an ‘after’ shot with the new stitch already through, leaving you to fill in the gaps.
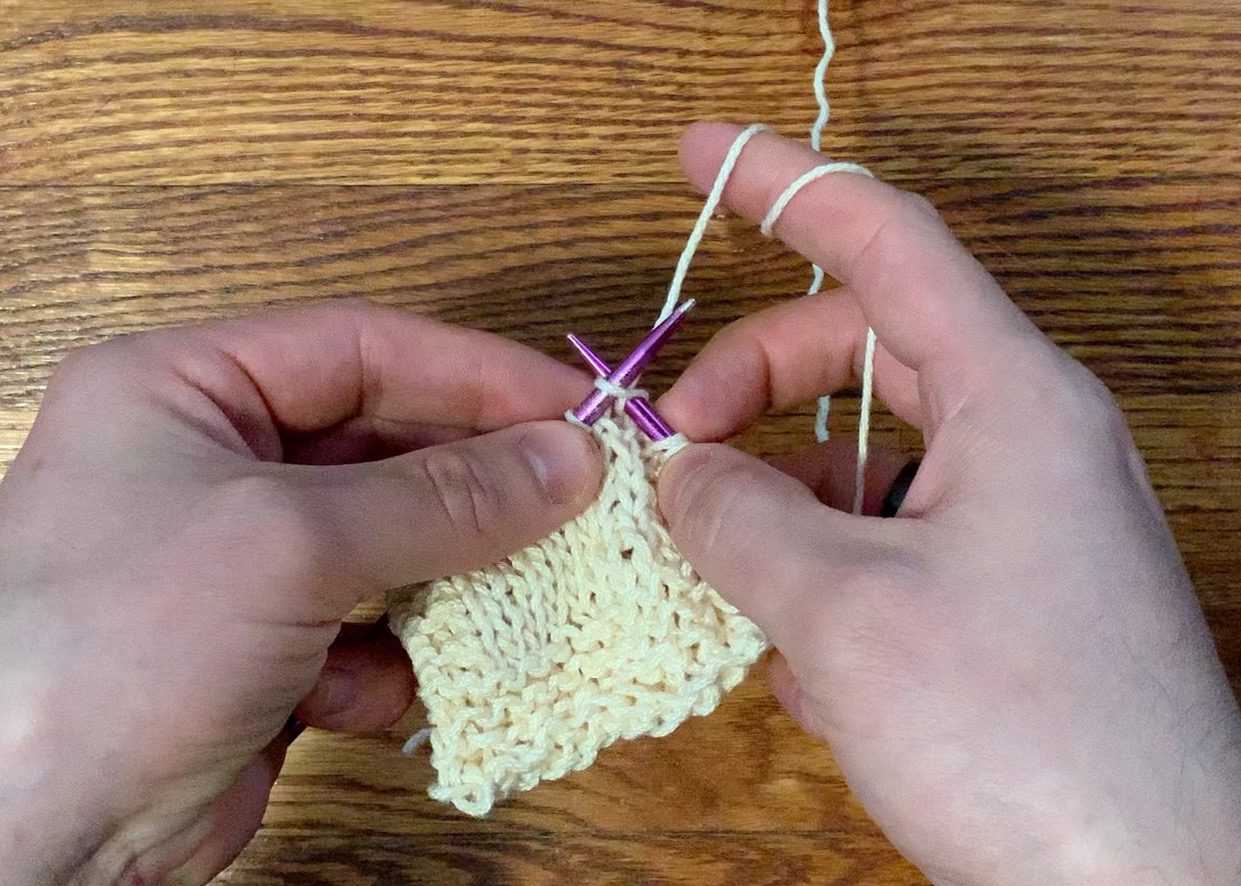
Step 2: The yarn is wrapped around the working needle.
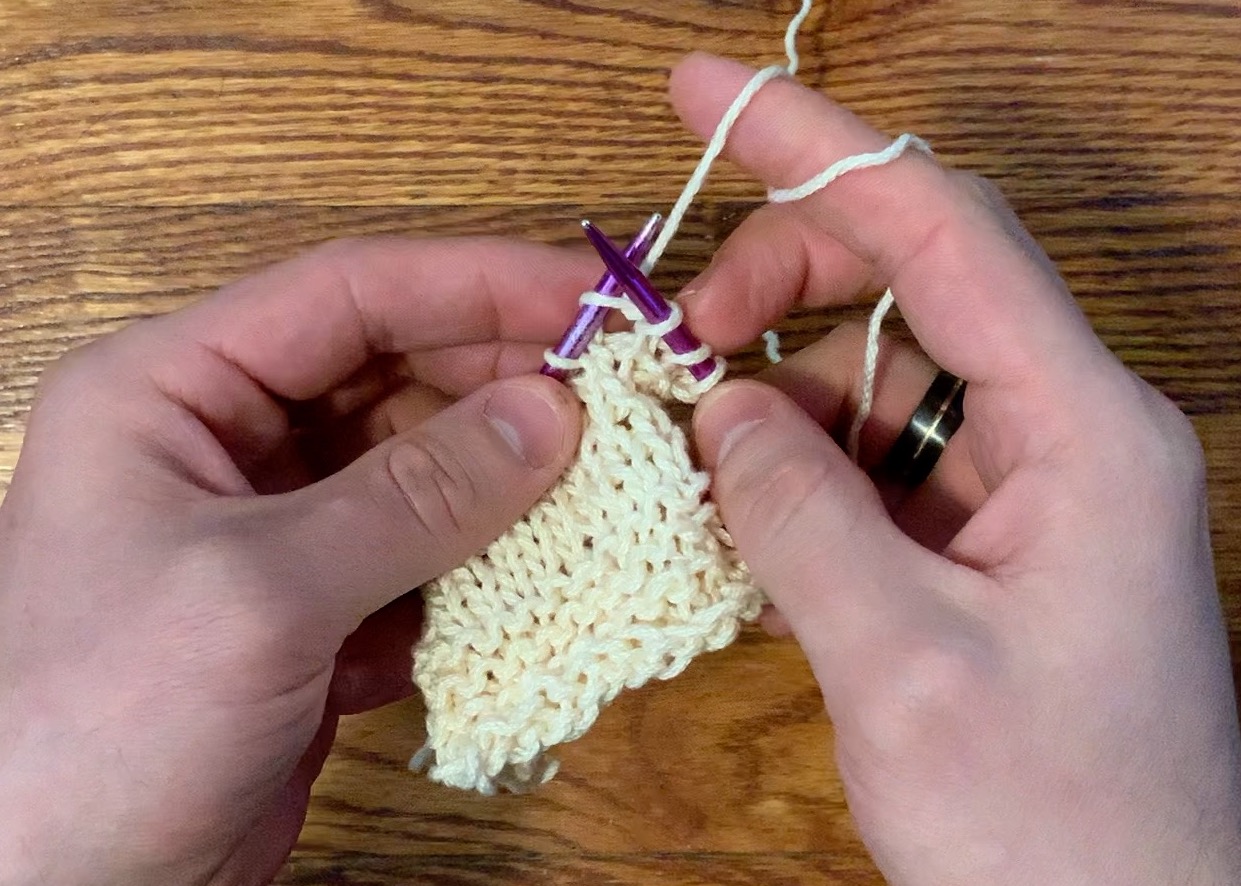
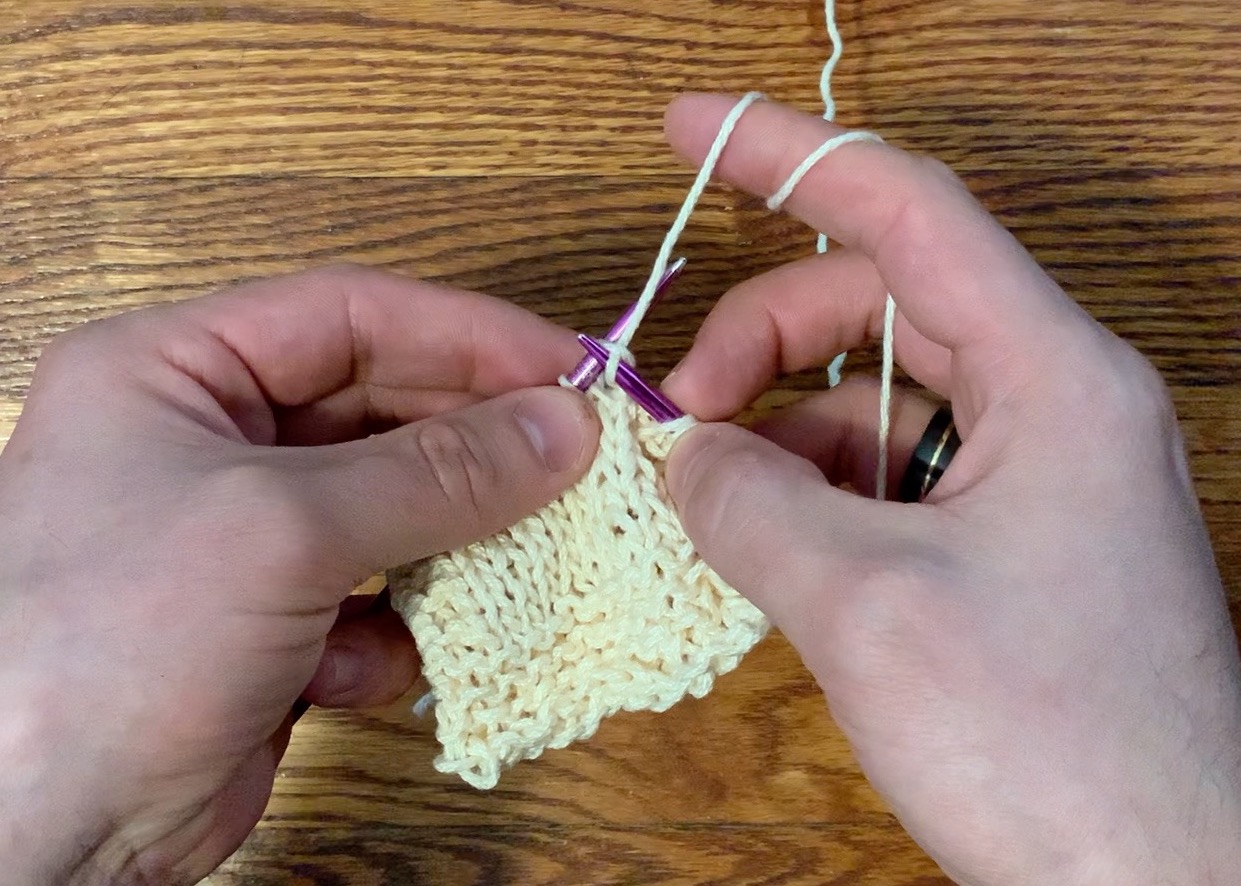
Step 3: The yarn has been pulled through the stitch. What happened in between?
I may be alone, but I always interpreted the ‘pull’ directive to mean that I should somehow be drawing the looped yarn down with the needle and through the stitch being knitted/purled. However, I started learning on metal needles which were very low friction and didn’t give me much purchase to do any pulling on the working yarn. I muddled through but I think it could have been better explained in the first place, and that’s what I aim to do here.
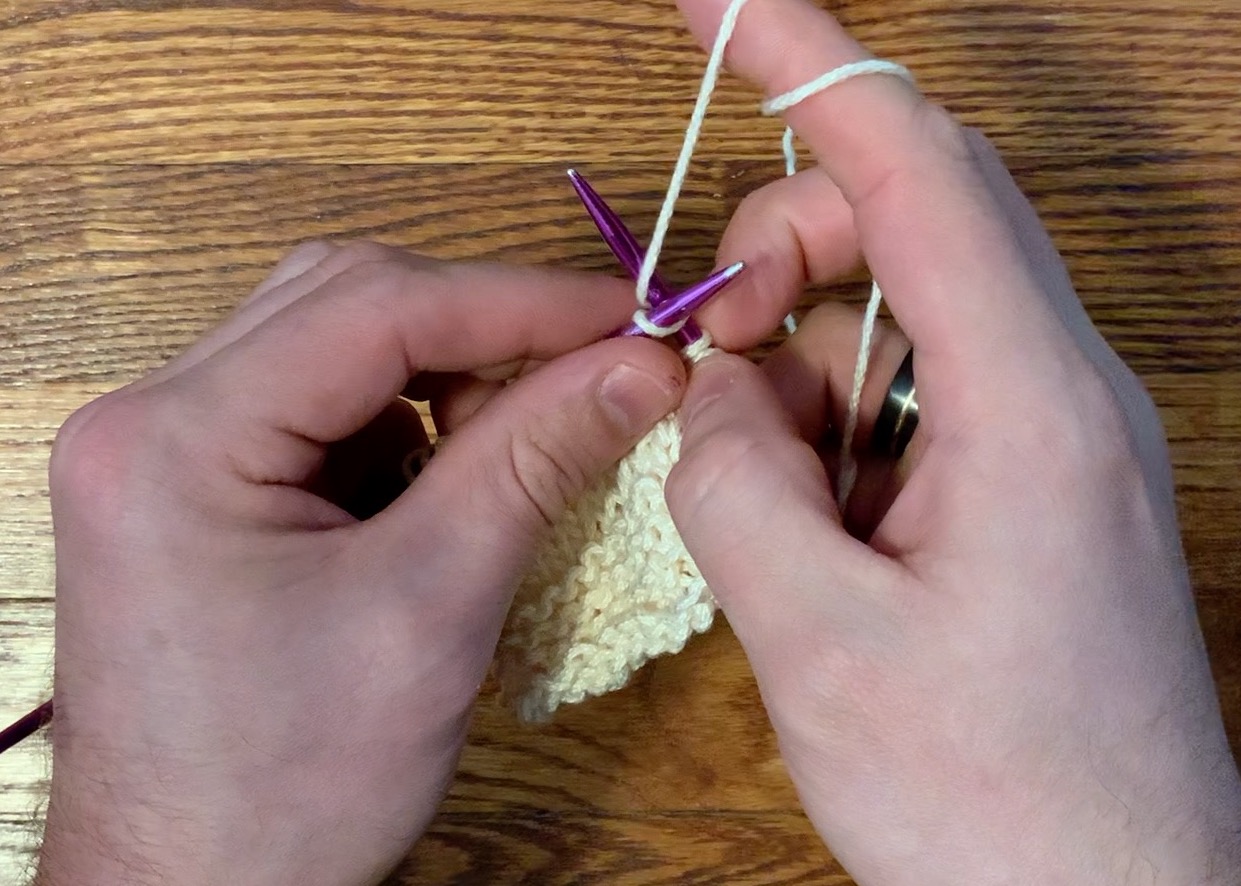
We start off the same, inserting the needle knitwise through the next stitch and wrapping the yarn around the needle.
Viewed from above, the natural position with our hands in front of us, it’s clear that the looped yarn needs to be ‘pulled’ down and through the stitch.
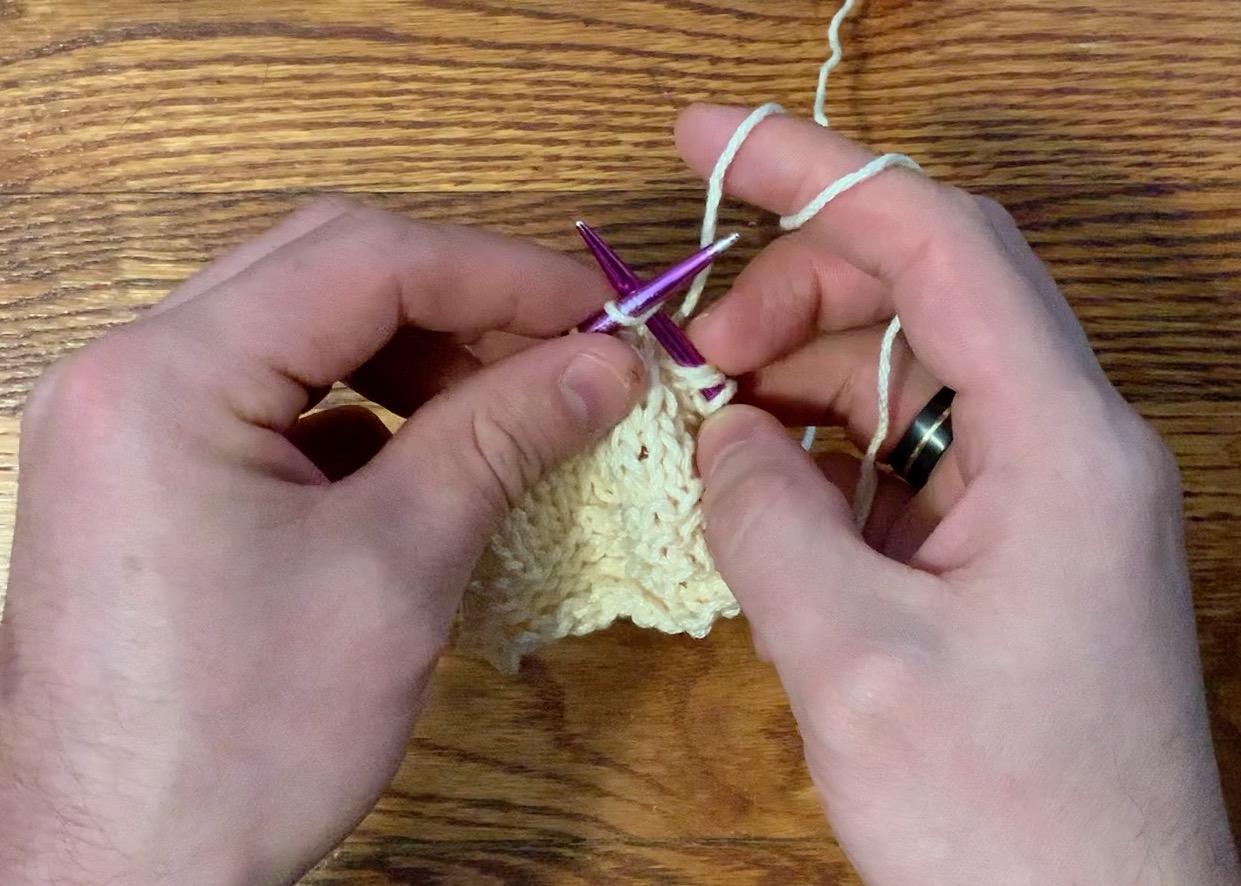
However, if we rotate our hands to view from a different plane, we can see that from this perspective the looped yarn is already below the stitch, ready to be passed through.
It’s a bit pedantic, but I would describe this step as ‘pushing’ the yarn through the stitch, rather than pulling it. As we can see, it’s not necessary to move the looped yarn along the axis of the working needle at all; as long as you are approaching it from the correct plane, the act of wrapping the yarn has already placed it in the correct position to be drawn through the stitch.
This is just as true for purl stitches as for knit stitches, although the observation angle is a bit more awkward on the wrists.
In sum, I would revise the generally-given steps to be as follows:
-
Insert the working needle knit- or purl-wise through the next stitch.
-
Wrap the yarn around the working needle appropriately.
-
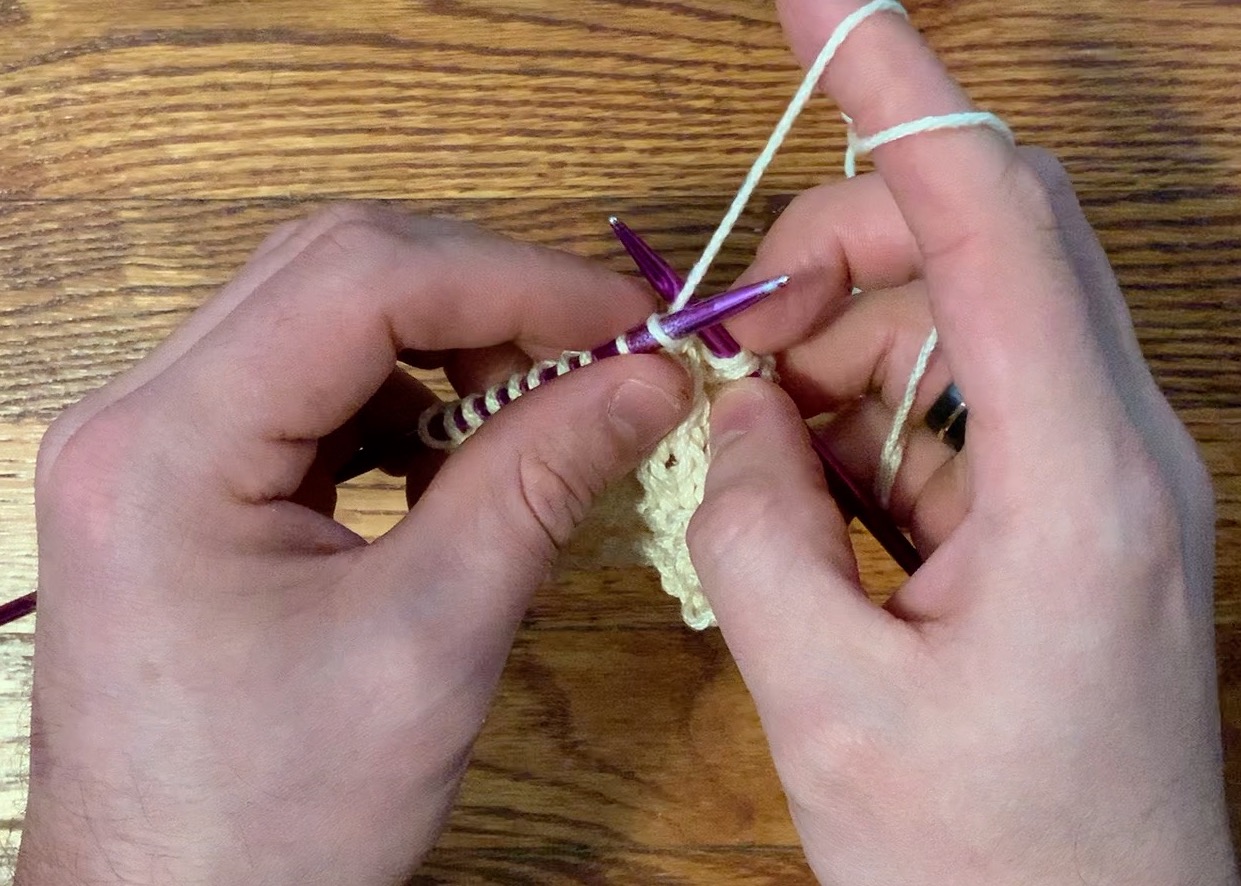
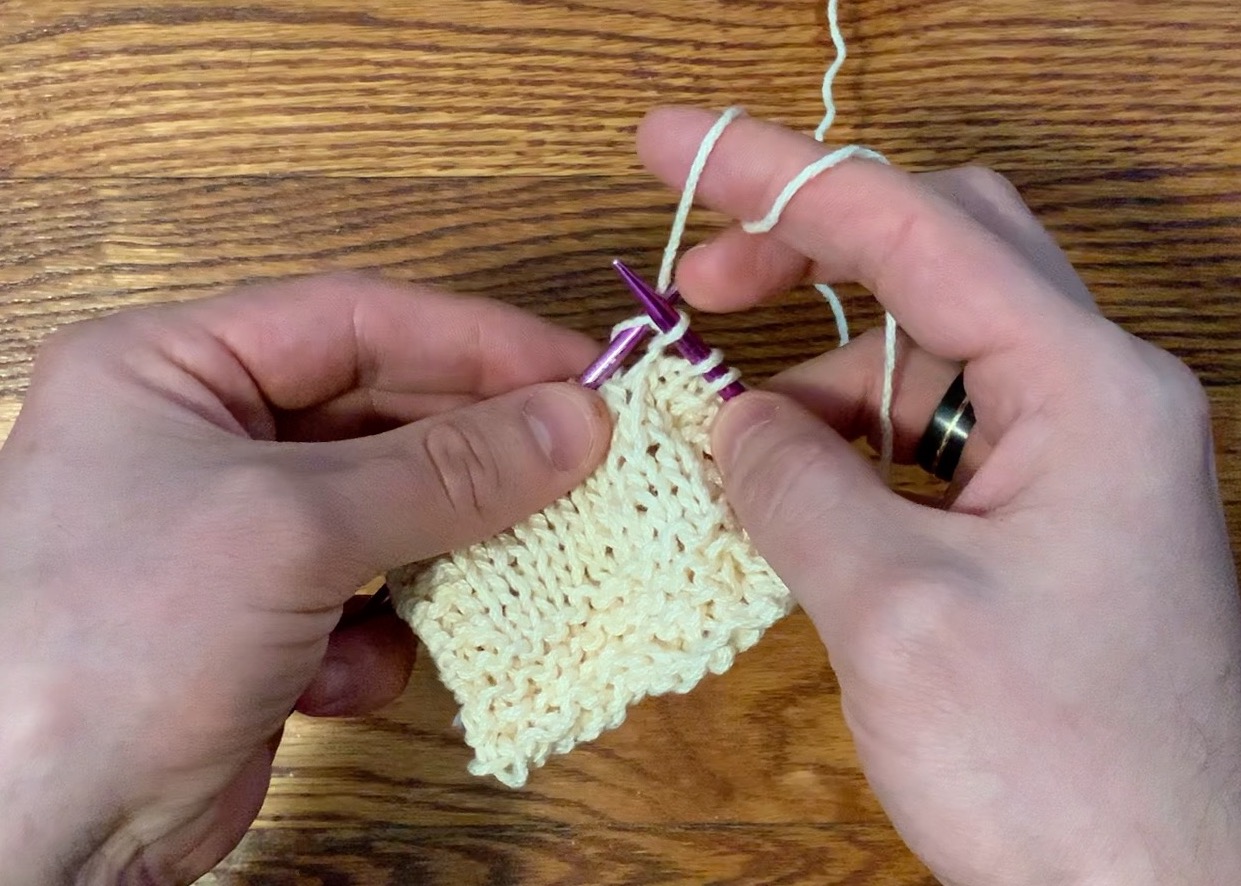
With the tip of the needle, catch the wrapped yarn and bring it back through the stitch, forming a new stitch on the working needle, and allow the original stitch to drop.
Taken together with the above illustrations, I think these instructions are a drastic improvement for anyone just learning to knit. You can also watch the companion video these images were taken from below.